In the networking world there’s a troubleshooting joke – It’s ALWAYS the DNS.. and when it’s not DNS, it’s probably still the DNS.
It’s only funny because it’s true.. though it never feels very funny at the time.
Intro
March 30th, 2026, was another great example of this maxim when GL.iNet’s Dynamic DNS service (glddns.com) had a three hour outage from roughly 6am – 9am US Eastern time.. of course on a Monday morning. Right as adventurous expats and nomads around the world were waking up and connecting their GL travel routers to their self-hosted VPN setups so they could login for a day of remote work, they suddenly found out their VPN was no longer VPN’ing.
This post is to help provide a very short summary of what DDNS does for you, why it can break your setup and a few things you can do to prepare or mitigate. This was written with a focus on those using GL.iNet routers, but the core principles are universal across many home VPN setups.
TL;DR: head right to the quick fix.
What DNS & DDNS (Dynamic DNS) Actually Does
We’ll start with DNS – the Domain Name System (DNS) is the internet’s phone book. In short it translates human readable domain names (like example.com) into IP addresses that can be used by your computer (e.g. 104.18.27.120) to connect to each other. Remember 1-877-CASH-NOW ? (thanks J.G. Wentworth), well “CASH-NOW” would be like the name (domain) a human could remember, and “227-4669” would be like the dinosaur version of an IP that phones could actually use to find each other and connect across the world.
Internet DNS is an immensely complex distributed system, and you can get a nice start down that rabbit hole here, but let’s assume you don’t care for now. For today, “normal” DNS usually points to a fairly fixed IP endpoint and the name/IP mapping isn’t expected to change that often (yes nerds, drastically oversimplifying, my bad).
Now we have Dynamic DNS (DDNS).. basically DDNS is just regular DNS, but for an IP address that is expected to change fairly often – like a residential home IP address. Most residential Internet Service Providers (ISPs) assign their customers’ dynamic public IPs that are subject to change without notice (unless you specifically pay for a static IP). In reality, some ISPs may keep the same IP assigned for years, but others may assign you a new IP address every time your modem reboots.
So.. how do you deal with a situation where “CASH-NOW” could be 227-4669 today, but moves to 443-5123 tomorrow? You need something that constantly updates the phone book. This is where a DDNS “client” comes into play. On GL.iNet routers that’s under Admin Panel > APPLICATIONS > Dynamic DNS > Enable DDNS. On that page you’ll see the DDNS hostname (url) of your specific GL router in the format of: xxxxxxx.glddns.com. Each GL router is assigned a unique DDNS url and enabling the service starts a little IP updater background program on the router. You typically only need it running on your VPN server/home router.
GL DDNS Normal Process Flow
- The GL DDNS client does the program equivalent of visiting “whatismyip.org” every 10 minutes to find your home public IP address (e.g. 123.11.11.11)
- If your IP has changed since the prior check, then DDNS client reaches out to GL’s DDNS servers and notifies it that the IP address for xxxxxx.glddns.com has now changed to 123.22.22.22.
- When you created your VPN client profile for your travel router and exported it, you hopefully included the “Use DDNS” feature (if you were following how-to guides) so that your VPN client (travel router) could take advantage of using DDNS to locate the current home IP of your VPN server router.
- Now when the VPN client on your travel router starts up, it asks the GLDDNS.com server (the master phone book for all *.glddns.com domains) – hey, what’s the current IP address for xxxxxx.glddns.com?
- The GLDDNS server now responds back with a new 123.22.22.22, so now your VPN client then knows where to go find your home server and establish the connection.
When Things Go Sideways
Now there’s a number of places in the process above where something can go wrong, it could be the DDNS client on the router has an error and stops running; or it could be you forgot to export your VPN profiles using your DDNS url, so your client is trying to reach out to a fixed IP address that’s since been changed by your ISP. These would typically be “you” problems to troubleshoot – but on March 30th it was a “them” problem. The master phone book, the GL DDNS server, went offline.
Monday Morning’s Process Flow:
- You wake up and plug in your travel router. It connects to the internet and starts up the VPN client.
- The VPN client looks at the xxxxxx.glddns.com url listed in your active VPN client profile and reaches out to the GL DDNS server to look up the corresponding IP address.
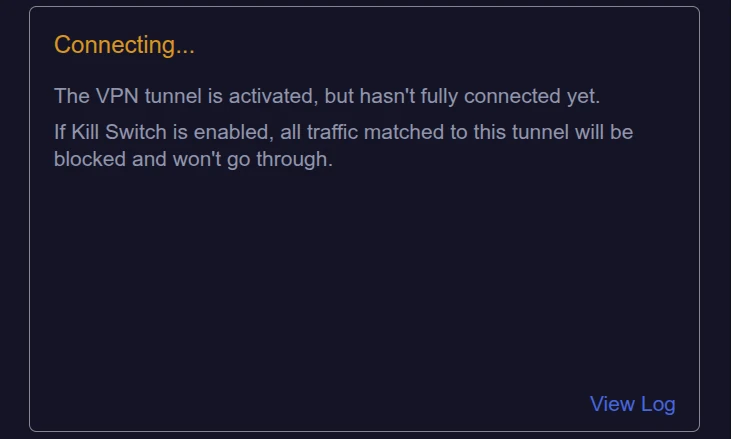
- Instead of getting back a nice little dotted-quad IP address, your VPN client gets
queryA EREFUSED, which is DNS machine speak for piss off. - Your VPN client / travel router now has no IP to connect to, so you get to stare at the yellow colored “Connecting” on your VPN Dashboard, wondering what your excuse is for missing the most important meeting you’ve ever had scheduled.
- Many of you with secondary/alternate home servers calmly switched the VPN client profile on your travel router to your backup, while complimenting yourself on having such forethought and preparation.. until you get the exact same result.
- 5b. A few hundred of you then text, call and whatsapp Ken at 6am local time politely requesting to know why the internet is broken (I’m not bitter ; ) and prompting his subsequent motivation for this blog post.
- Your VPN client sits there in yellow status for hours, continually retrying, while you’re urgently researching prices on emergency-flights-home.com.
- Right as you start tossing clothes in your suitcases, you notice the VPN client has turned green and everything starts working again.

Why does this happen? It really shouldn’t. RFC 1034 and RFC 2182 have made it abundantly clear to anyone setting up DNS services since the 1990’s, that DNS servers should always be deployed in pairs, with the secondary server at least on a separate machine, and preferably in a separate data center to provide redundancy against these exact types of failures (nudge nudge, wink wink, GL). We definitely have a right to expect better; but in the meantime..
What Can I Do?
Remember when I said it’s always the DNS? Well, sometimes it’s not the DNS.
There are many other reasons the VPN client on your travel router could be failing to connect / stuck on yellow. Many of these are covered here – and while the GL DDNS servers have gone down before, it’s going to be much less common than many other common day-to-day scenarios, so first we need to do a quick sanity check.
Symptoms of DDNS Failures
- Check GL.iNet’s DDNS server status: using Admon’s community GL Services status tracker (bookmark this page). If you see a bunch of red ticks under the GL DDNS section, then your issue is probably DDNS, and specifically GL’s DDNS servers (ahem, server.. singular). If this is green, it’s probably back to a “you” issue.
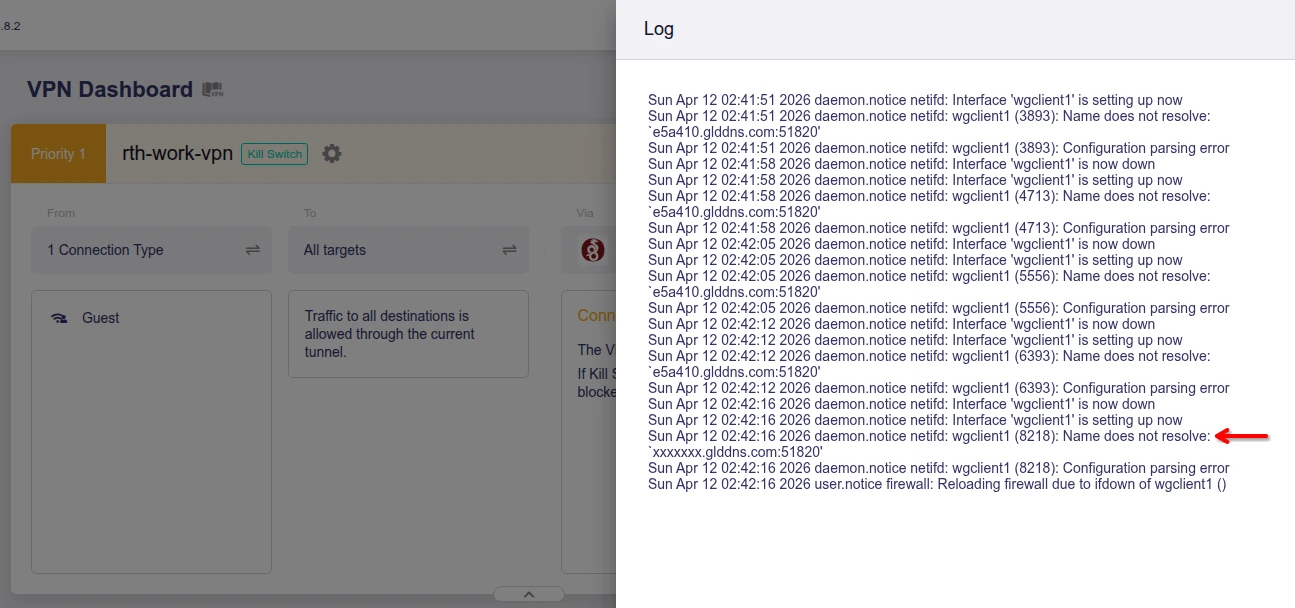
- If you look in your travel router’s VPN client logs and see errors:
Mon Mar 30 00:06:38 2026 daemon.notice netifd: wgclient1 (10379): Name does not resolve: `xxxxxxx.glddns.com:51820'. Then it might be DDNS, and maybe just your server router’s DDNS.. but it could also simply be your travel router is offline or stuck behind a captive portal with expired auth. - If you also have the WireGuard or OVPN VPN app on your cell phone with profiles to connect to the same home/server router, and you also get errors on your phone app about “
ERR DNS Resolution“, then it’s even more likely it’s DDNS. - If you take the exact xxxxxx.glddns.com url of your VPN server/home router (not of your travel router) and put it into nslookup.io, and get back “A records” = ” No A records found.”; then you really, really likely have a DDNS problem. (More about finding this url below.)
But really.. who are we kidding, it’s ALWAYS the DNS, so..
DDNS FAIL QUICK FIX
This section will require you to know the current public IP address of your home/server router. If you don’t already know where to find that, then start down here and come back to this when you have it.
1. Create a Fixed IP VPN client profile to bypass DDNS/DNS.
This section is the immediate fix to get you back online and connected to your VPN. Once connected, then you can deal with future mitigation approaches. The quick fix isn’t to actually “fix” the DDNS, but instead bypass it entirely.
For WireGuard VPN protocol users:
In your Travel Router Admin Panel, go into the VPN > Wireguard Client menu. Click the 3 dots to the right of your current active configuration, select “View” and then copy the entire block shown in red below to your clipboard.
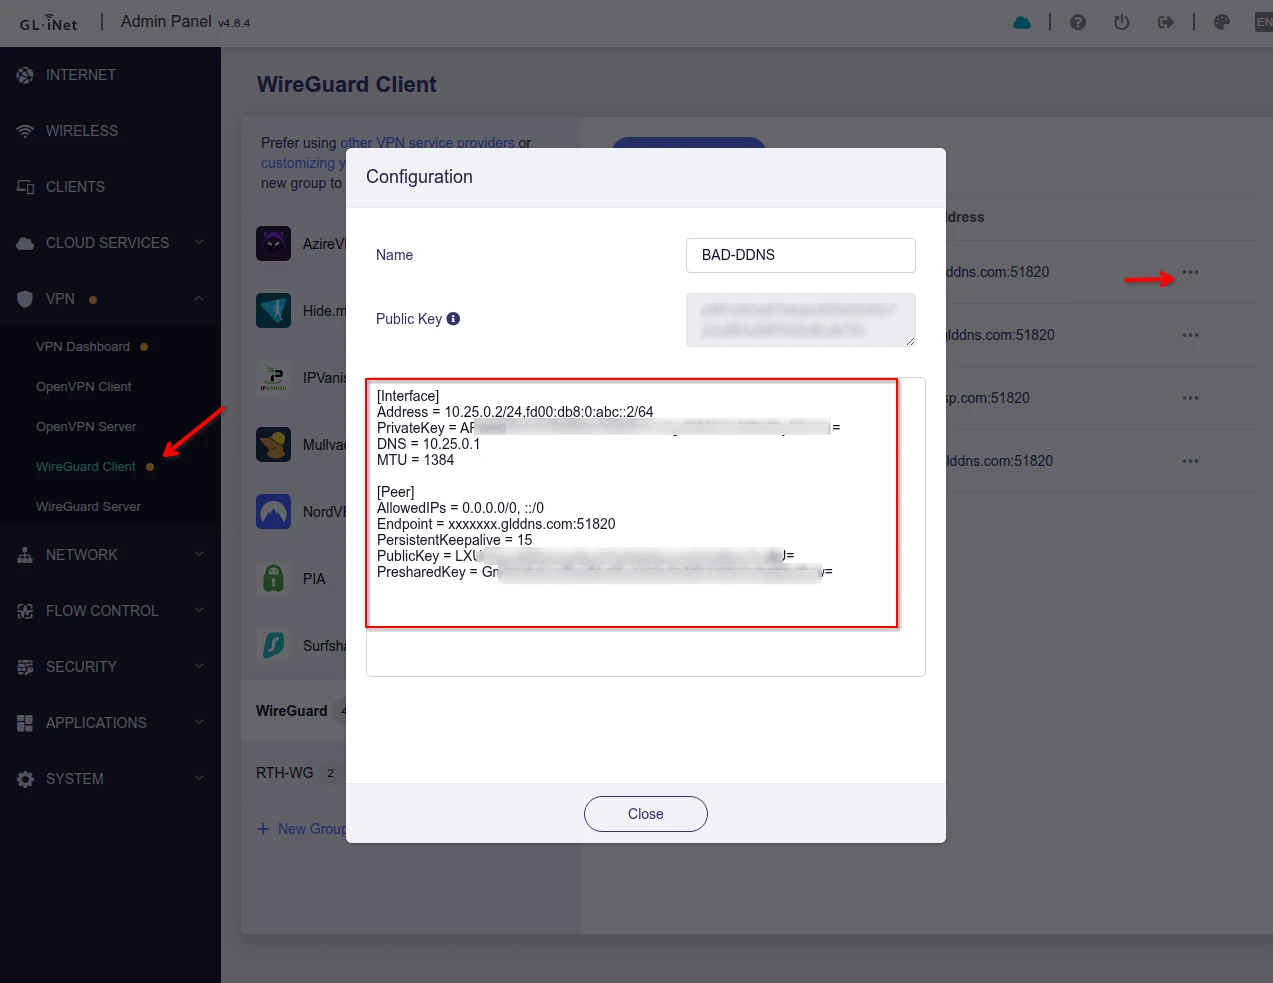
Close out of pop-up box, then click the blue “Add Configuration” button , and then “Manual Input” to create a new profile. Paste in the entire block *over the top* of the new box’s default contents (replace them).
Now look for this line containing your current DDNS url:Endpoint = xx1x111.glddns.com:51820
And replace the bolded url portion with your home/server’s public IP address. Do not change the existing port (the :XXXXX portion at the end), even if it’s different than the default 51820:Endpoint = 11.22.33.44:51820
Then save it with a profile name of “HOME FIXED IP” (up in the Name box). Now try to activate this profile (click the 3 dots on the right again, and click “Start”).
This static profile will enable you to connect even when DDNS is entirely broken as long as you have the correct home IP. If you’re sure the server/home IP and port is correct, and this does not fix your issue, then your issue wasn’t DDNS to begin with and it’s time to head here for more troubleshooting.
Assuming this worked on your router, you can now also repeat this process for WG client profiles you may have loaded in the WireGuard app on your phone.
For OpenVPN VPN protocol users:
This one is tougher as the OpenVPN client config details are not accessible in the GL GUI. You’ll need to use the SSH CLI to locate and extract your current OpenVPN profile from your travel router. If you don’t know how to SSH into your router, read here first.
Login with ssh (username is “root”, password is your router Admin password)ssh root@192.168.8.1
List your .ovpn config files. This will show you the different profiles and their parent directory (the group folder in the GUI):find /etc/openvpn/profiles -name "*.ovpn"
Display the profile you want:cat /etc/openvpn/profiles/812345/client.ovpn
Open a text editor (e.g. notepad) on your PC and copy/paste everything from above. The first line should be “client” and the last line “daemon”.
Save the file and create a copy with the name “HOME-FIXED-IP.ovpn”. Ensure there’s no .txt extension at the end.
Now edit the file and find this line:remote xx1x111.glddns.com 1194
And replace the bolded url portion with your home/server’s public IP address. Do not change the existing port (the separate digits after the space), even if it’s different than the default 1194:remote 11.22.33.44 1194
In your Travel Router Admin Panel, go into the VPN > OpenVPN Client menu and click on the same Group as your current active OVPN profile. Then click the blue “Upload Configuration File” button to upload your new FIXED-HOME-IP.ovpn file.
Now try to activate this profile (click the 3 dots on the right again, and click “Start”).
This static profile will enable you to connect even when DDNS is entirely broken as long as you have the correct home IP. If you’re sure the server/home IP and port is correct, and this does not fix your issue, then your issue isn’t DDNS to begin with and it’s time to head here for more troubleshooting.
DDNS Failure Future Mitigation
1. Leave the router running
This one isn’t a fix, but an easy preventative mitigation. The WireGuard/OpenVPN VPN client on your travel router performs the DDNS url lookup at its initial connection. Once it has an established connection to the server IP address, it stops checking for IP changes and just sticks with what it has until something interrupts the tunnel. It doesn’t matter even if the DDNS record’s TTL expires, as that would only impact whether or not the router uses the prior cached record for a *new* lookup (e.g. if the tunnel is interrupted).
If you have a stable internet at your travel location, and just leave your VPN tunnel running, it can stay connected for weeks at a time without needing to do any further DDNS lookups and you could sail past an outage without ever knowing it happened. The modern GL travel routers are designed to run 24/7 and have low power draw, so if there’s not a local need to turn it off, then simply don’t. (I would still shut down any connected work laptop/PC at night to avoid unattended OS updates though.)
2. Use an alternate DDNS client on your GL router or other device
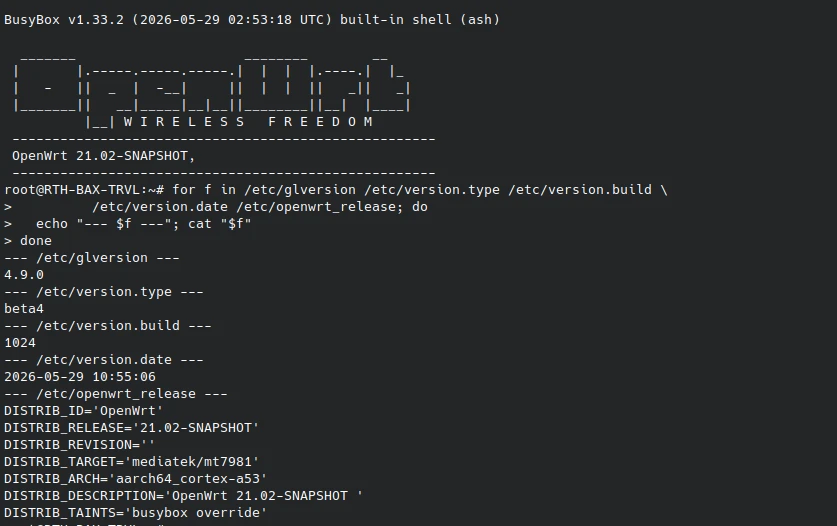
OpenWRT DDNS support (on the same router)
GL.iNet routers are built on the OpenWRT operating system (with heavy customization). The GL GUI is a slick UI layer built on top to provide ease of use and extended capabilities. You can check out the underlying OpenWRT interface under SYSTEM > Advanced Settings > Go to LuCI. In the LuCI interface there are many more options (as well as the potential to break things). For the adventurous, you could run a secondary DDNS client from another service provider on your same server router for redundancy. Then you could create added VPN client profiles on your GL travel router that substitute in the alternate DDNS url (just like the Fixed IP examples above). DiY research starts here: https://openwrt.org/docs/guide-user/services/ddns/client
Use a built-in DDNS profile from your primary/ISP router
Many ISP and aftermarket routers may have their own built-in DDNS service. If the router is in the same house (same public IP) as your GL server router, you can enable the service on that device and then use the DDNS url from it to also create added VPN client profiles on your GL travel router that substitute in this alternate url (just like the Fixed IP examples above).
3. Have Tailscale or ZeroTier configured as a backup VPN protocol.
Even if you prefer using WireGuard/OpenVPN as your primary VPN protocol (there are good reasons these are often the first choice), you can also configure TS or ZT as a backup. These protocols do not rely on DDNS or port forwarding. Your server router can run and “listen” on all 4 protocols concurrently (WireGuard, OpenVPN, Tailscale & ZeroTier), and then on your GL travel router you just need to pick which one you want to use/activate at any given time. (For example, RTH Signature VPN customers have WG, OVPN and ZeroTier all pre-configured on both routers by default for easy switching.)
To use these protocols you’ll need a GL router model that has new enough firmware for TS or ZT support (or another home server device like an RPi).
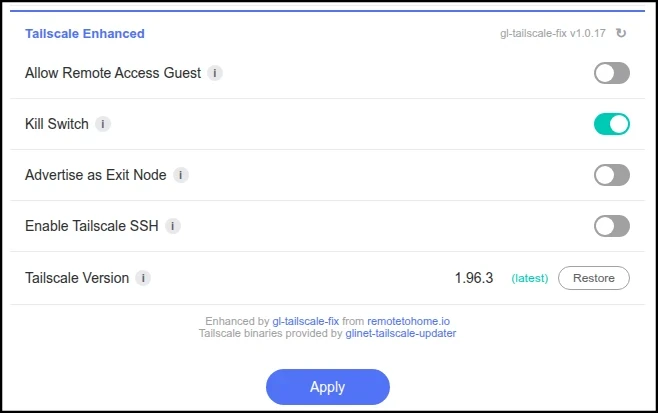
Tailscale “Custom Exit Node” VPN
For using Tailscale securely as a VPN, I’ll recommend using our gl-tailscale-fix plugin & how-to guide. The current default GL implementation of Tailscale has security gaps this closes.
ZeroTier “Managed Route” VPN
Future blog post pending – try back later please : |
How To Find Your Current Home / VPN Server IP Remotely
There are multiple options here. For all of these, the goal is to find your current public IPv4 address, which will be in a dotted-quad format (eg: X.X.X.X).
Some devices inside your home may also show the internal private (LAN) IPs from your home networks (e.g: 10.x.x.x or 192.168.x.x), which you can ignore. You are looking for the single WAN IP (Internet IP) that’s assigned to your primary ISP router/modem and that all your home devices are ultimately routing through to reach the public internet. You can also ignore any IPv6 address you find, which will be in a long alphanumeric format with colons (e.g. 2001:0db8::0001:0000).
GoodCloud (from GL.iNet)
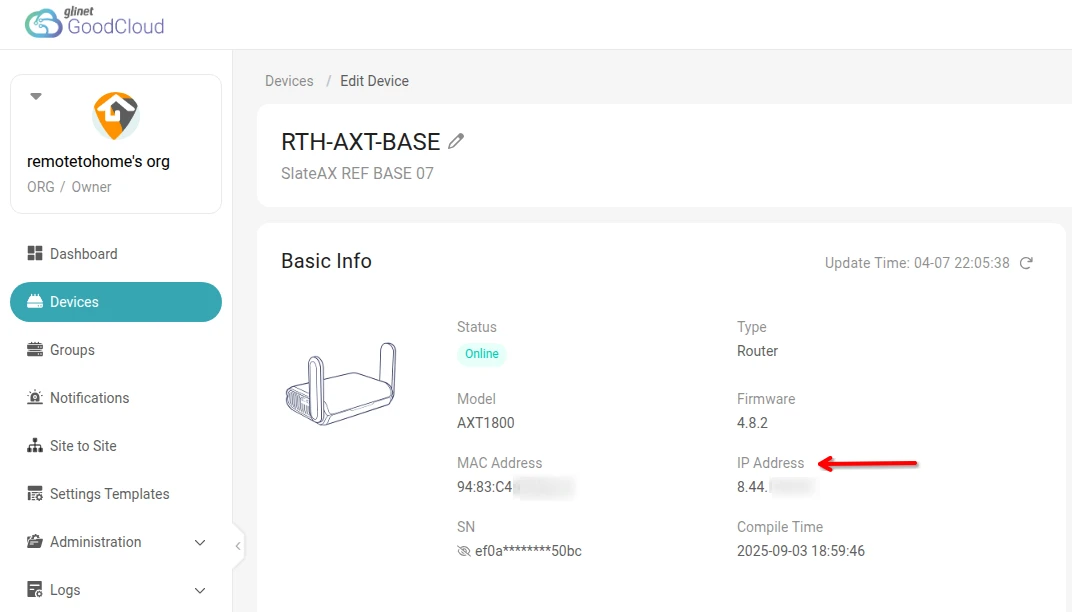
GoodCloud.xyz – If you previously enrolled your server router in the GL.iNet Goodcloud service, then you can log-in and check the current online status from: Devices > (server router name) > IP Address
ZeroTier
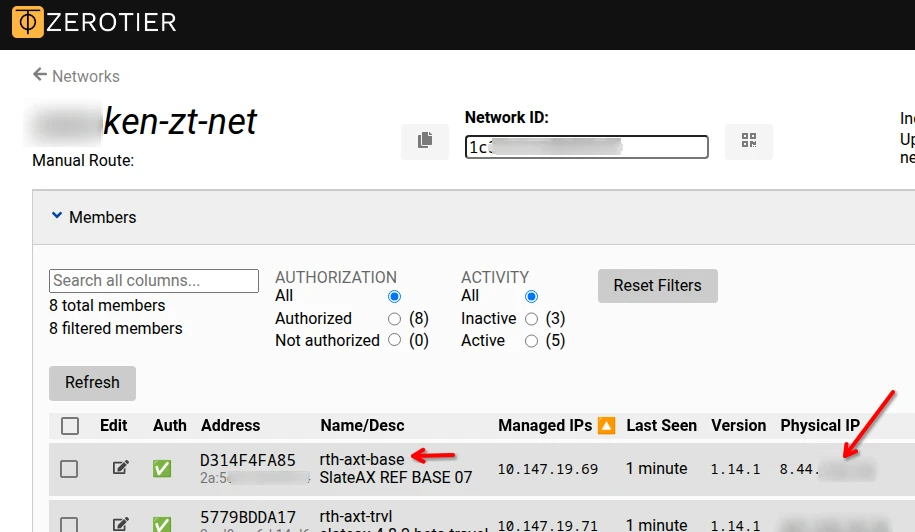
ZeroTier (e.g. Signature VPN customers) – if you previously enrolled your server router with ZeroTier, then you can login to your ZT dashboard using the “Legacy Central” option. Once logged in, click on your Network ID, then scroll down to your device list (the grey rows). One should list your “home” (server) device and the “Physical IP”.
Tailscale
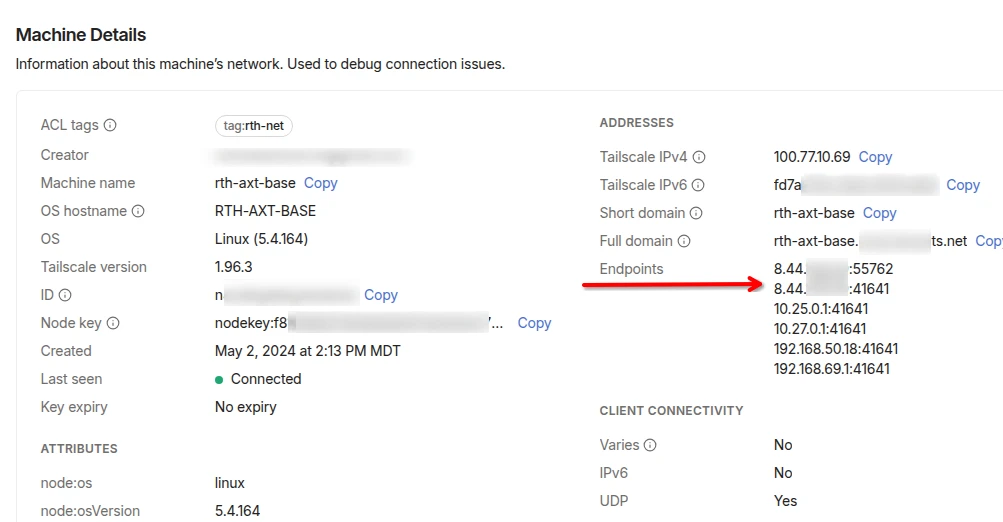
Tailscale – if you previously enrolled your server router with Tailscale, then you can sign-in to your tailnet, then click on the “Machines” tab, then click on the name of your home/server router. On the next page, scroll down under “Machine Details” and look at the top “Endpoints” IP. Again, you can ignore the other private IP ranges (e.g: 10.x, 192.168.x).
Check with your ISP (Internet Service Provider)
You can likely get the current home IP address assigned to your account from your ISP company.
- Check your ISP mobile app if you have one (e.g. Xfinity Wifi app, Cox Panoramic app, My Spectrum app, etc). Look in the app for anything that shows the “Internet IP” or “WAN IP”.
- Check your ISP website account. Login to your ISP’s web portal and check if you can find any section that has modem or router details, and again, look for the “Internet IP” or “WAN IP”.
- Call your ISP. If you call and can verify your account details, then an ISP customer service rep should be able to tell you the current Public IPv4 assigned to your home modem.
Other IoT Devices / Apps
You may have other internet devices in your home that report your current home IP in a mobile app or web dashboard. Think about any apps you have for remote cameras, alarm monitoring, home sensors/IoT devices, home appliances, etc. All of these are constantly connecting to the cloud via your home IP address, and if you’re lucky, they might show you that IP in the app diagnostics somewhere, or in a web portal (might as well get something back for all that 3rd party telemetry collection).
Last Resort: Physical Check
Have someone at your home connect to your primary home wifi (they could even be standing outside if it has enough range) and give them your home wifi name and password. Once connected, they can visit whatismyip.org or ifconfig.me from their device and send you a screenshot (or any of the other IP check websites). Just ensure they are connected via your wifi only (not mobile data) and don’t have a VPN app running on their phone at the time.
Once you think you’ve found your home IP, then you’re ready to try the QUICK FIX. There’s no harm if you get it wrong the first time – you’ll still simply fail to connect (right where you are now) and can just try again with another IP after further digging.
Summary
Any solo DDNS service is a single point of failure for a self-hosted VPN setup. GL’s DDNS infrastructure is weaker than it should be – but they’re working on it. In the meantime, when it goes down, your travel router can’t find your home server and your VPN stops connecting. The quickest fix is to create a backup VPN client profile using your home router’s actual IP address instead of the DDNS hostname, bypassing DDNS entirely.
For longer-term resilience: keep your travel router running to avoid unnecessary reconnections, configure a secondary DDNS provider, or set up Tailscale or ZeroTier as a backup protocol that doesn’t depend on DDNS. The best defense is having more than one way to connect before you need it.
If there is any single takeaway that matters most – always have a backup connection to your server router that does not depend on the VPN being able to connect.
Supplement
I pinky swear I’ll come back soon to finish these up:
How to create “Fixed IP” profile copies on your WireGuard phone app: – hint, it’s basically the same process (coming soon)
Recommended GL.iNet router models for running Tailscale or ZeroTier: (coming soon)
Safe travels!
Still have questions? Want a custom tailored privacy solution used by hundreds of expats across the world daily? Contact us